Archive for October 2011
Learn Cisco Voice over IP – VOIP – Netmaster Class

Learn Cisco Voice over IP – VOIP
This training package allows you to master these key Cisco voice technologies in the most efficient manner possible.
The LEARNiT: CVOICE (Cisco Voice over IP) package includes the following:
-Reference Sheets explaining all major features of the products
-Video-On-Demand recordings by NetMasterClass instructors
-Practice Exam Database
This course is recommended for the following IT Professionals:
Those that want to master Cisco Voice over IP for network implementations
Those that want to obtain the CCVP Certification
Those that want to begin CCIE Voice track preparation
Video-on-Demand Outline
Quote:
Analog Voice Port Configuration
Configuring signaling on an FXS port
Selecting a ring frequency
Customizing distinctive rings
Verification and troubleshooting tips
Saving configurations
Digital Voice Port Configuration
Specifying a clocking source
Framing configuration
Selecting appropriate line coding
Enabling Channel Associated Signaling (CAS)
Creating DS0 groups
Verification and troubleshooting tips
Saving configurations
Dial Peer Configuration
Creating a POTS dial peer
Creating a VoIP dial peer
Creating a backup dial peer
Manipulating digit stripping
Influencing dial peer selection
Placing a VoIP call between two analog phones
Verifying backup path selection
Saving configurations
H.323 Configuration
Configuring an H.323 gatekeeper for local zones
Specifying zone prefixes
Defining a default technology prefix
Configuring gatekeeper-based Call Admission Control (CAC)
Explaining gatekeeper bandwidth calculations
Configuring an H.323 gatekeeper to register with a gatekeeper
Updating dial peers to use Registration, Admission, and Status (RAS)
Discussing H.323 and E.164 gateway IDs
Viewing RAS message counts
Placing a call between two analog phones via an H.323 gatekeeper
Verifying a gatekeeper call and bandwidth usage
MGCP Configuration
Configuring a router as an MGCP gateway
Adding an MGCP gateway to Unified CallManager (UCM)
Defining an MGCP endpoint
Verifying MGCP endpoint registration
Placing a VoIP phone call to an analog phone attached to an MGCP gateway
SIP Configuration
Defining a SIP server
Creating a SIP dial peer
Configuring a voice port for caller ID
Examining SIP addresses
Placing a VoIP phone call between a SIP phone and an analog phone
Download Link:-
Learn Cisco Voice over IP – VOIP
Tag :
CBT Video Training
TRAINSIGNAL – COMPTIA PROJECT+ TRAINING

COMPTIA PROJECT+
Pass the Exam with CompTIA Authorized Quality Curriculum! Over 10 Hours of CompTIA Project+ Training Teaches You Project Planning, Risk Management, Project Life Cycles, Change Management and Much More!
Download Links:-
DVD1:
COMPTIA PROJECT+.DVD1.part2
COMPTIA PROJECT+.DVD1.part3
COMPTIA PROJECT+.DVD1.part4
COMPTIA PROJECT+.DVD1.part5
COMPTIA PROJECT+.DVD1.part6
DVD2:
COMPTIA PROJECT+.DVD2.part2
COMPTIA PROJECT+.DVD2.part3
COMPTIA PROJECT+.DVD2.part4
COMPTIA PROJECT+.DVD2.part5
COMPTIA PROJECT+.DVD2.part6
Tag :
CompTIA
CBT NUGGETS – MICROSOFT SHAREPOINT 2010 CONFIGURING AND ADMINISTRATOR DVD

MICROSOFT SHAREPOINT 2010 CONFIGURING AND ADMINISTRATOR
SharePoint Server 2010 puts Microsoft Office workflow under your command. Tim Warner’s training provides a very nice balance between transferring practical SharePoint administration skills, end-user/information worker skills, and certification exam preparation. It also covers the major troubleshooting touch-points that frustrate IT administrators. With SharePoint Server 2010 you’ll facilitate collaboration and Enterprise search, provide content management features, implement business processes, and supply access to information essential to organizational goals and processes.
Download Links:-
Configuring :
MICROSOFT SHAREPOINT 2010 CONFIGURING.part2
MICROSOFT SHAREPOINT 2010 CONFIGURING.part3
MICROSOFT SHAREPOINT 2010 CONFIGURING.part4
Administrating:-
MICROSOFT SHAREPOINT 2010 ADMINISTRATOR.part2
MICROSOFT SHAREPOINT 2010 ADMINISTRATOR.part3
Tag :
CBT Video Training
CBT NUGGETS – VMWARE VIRTUALIZATION VCP VSPHERE 4 (2010)

VMWARE VIRTUALIZATION VCP VSPHERE 4 (2010)
VMware Virtualization VCP vSphere 4
Whether you’re an experienced virtual administrator or a beginner, Greg Shield’s outstanding vSphere 4 training is exactly what you’re looking for.
Greg is revered as a virtualization guru. After watching this series you’ll have a wealth of insider information at your fingertips on how best to build storage, networking, performance management, backup, and disaster recovery elements into your VMware ESX environment.
Greg’s careful step-by-step instruction is your best option for building success into your VMware virtual infrastructure
while furthering your preparation for the VCP examination.
Introduction to VMware, vSphere, and the VCP & VCDX Certifications
Welcome to this Mastering VMware vSphere training series. Starting out the series is a look at VMware and vSphere, a review of the series, a look at the network that we will be creating throughout the course of this series, and a snapshot of the VCP examination.
8373 00:17:14
2 Understanding VMware’s Solution Suite
Understanding vSphere is one thing, but this product is only one in an entire suite of VMware solutions. In this nugget, you’ll learn about vSphere’s positioning in relation to the other products in VMware’s datacenter portfolio. You’ll also come to understand the core differences between ESX & ESXi as well as between Type I and Type 2 hypervisors (and why one is far better than the other for performance).
5853 00:19:21
3 Installing your First ESX & ESXi Server
Getting off on the right foot is the installation of your first ESX and ESXi servers. While relatively easy, this process has a few gotchas that you’ll need to know to be successful. This nugget also sets up the core hypervisor infrastructure that will be used throughout the rest of the series.
7453 00:27:35
4 Configuring Networking & Virtual Switches
Once installed, the first step with any ESX rollout is involved with correctly configuring its network connections. An ESX server tends to use a far greater number of NICs than a traditional physical server. This means that keeping each connection straight is important. In this nugget, you’ll learn about the three types of connections as well as where they make sense to implement.
6570 00:23:11
5 Connecting to & Working with Storage
Fibre Channel, iSCSI, DAS, NFS: ESX can leverage many different types of storage. And while each storage type might look similar in ESX’s management GUI, they all have their idiosyncrasies. This nugget explores each of the different types of storage, and provides a detailed walk-through of configuring iSCSI storage. Following along with your own environment? Don’t fear: You’ll learn about some free tools that enable easily creating your own shared storage.
5352 00:28:00
6 Configuring VMFS Datastores
Creating your connections to storage is only the first step. Like with NTFS volumes, the real work happens after that storage is formatted and made ready for use by the OS. The same holds true in VMFS, where you’ll learn about datastores, how they’re created and configured, and how to work with them in operations.
3234 00:19:29
7 Installing vCenter Server
Getting a single ESX server installed builds you a starter environment for your virtual infrastructure. But to go much beyond one or two ESX servers, you really need added management automation. Get that with vCenter Server. This nugget explores the installation of vCenter Server, as well as its prerequisites and the architectural decisions you’ll need to make prior to dropping its DVD into your drive.
2912 00:20:34
8 Managing vSphere with vCenter Server
Once installed, vSphere requires a bit of management as you’re ready to begin attaching ESX hosts. Although the vCenter Client looks similar when connected to ESX hosts or a vCenter Server, you’ll find that there’re a far greater number of options to consider. In this nugget you’ll learn about those options as well as the best practices for employing them.
2607 00:20:29
9 Deploying & Managing VMs and vApps in vCenter Server
Never thought it would take half a series before starting to work with your first virtual machines, eh? Nine videos in, we’ve finally completed the necessary configurations to start deploying and managing VMs and vApps within vCenter Server. This video discusses how to work with VMs, best practices for dealing with their management, and when you might consolidate VMs together to create slightly-more-powerful vApps.
3185 00:36:01
10 Migrating Virtual Machines, VMotion & Storage VMotion
VMotion is the hot topic when it comes to ESX and vCenter, but you can’t get there with just a few clicks. Actually creating an environment that enables VMotion and Storage VMotion requires additional configuration. This nugget discusses what you need, how to set it up, and how to be successful with the three different types of VMotion that are now available in vCenter 4.0.
1794 00:15:39
11 Managing Clusters, Resource Pools, & Fault Tolerance
While VMotion gets most of the press for its fantastic capabilities, the real excitement comes in the technologies that wrap around VMotion. Clusters, Resource Pools, Fault Tolerance, HA, and DRS: All of these integrate monitoring data with motioning technologies to create a highly-available infrastructure. If you thought VMotion was cool, you’ll really appreciate the automation that these technologies add to it.
2869 00:31:36
12 Installing & Managing vCenter Server Plug-ins
vCenter arrives with a highly extensible architecture, enabling you to install plug-ins when needed to add new functionality. This nugget starts a mini-series of vCenter plug-ins by explaining the plug-in architecture within the framework of VMware’s P2V products: VMware Converter and VMware Guided Consolidation. These two tools enable the automated Physical-2-Virtual conversion of virtual machines, adding performance management and actionable intelligence to candidacy and placement decisions.
1513 00:21:06
13 Working with ESX Host Profiles
Are you suffering under the weight of compliance regulations? Do you need to work overtime to maintain a baseline of configurations? If you do, then you’ll appreciate ESX Host Profiles. This feature creates an automated baseline of a “golden” ESX server, allowing you to compare every other ESX host against its reference profile. The result is a quick-and-easy solution for identifying where configurations aren’t correct, and a boon for large environments who must follow baselines.
1066 00:08:23
14 Working with vCenter Update Manager
Updating ESX and vCenter was easy when there weren’t many patches. But as the product grew and developed, its required number of patches also grew in size. Thus, the reason for vCenter Update Manager. This tool creates baselines of patches, deploying those which are missing to hosts that need them. Better yet, you can use Update Manager to patch your virtual machines as well, installing patches for OS updates as well as some notable applications. Very powerful this tool.
1565 00:23:08
15 Planning & Executing a vSphere Upgrade
vCenter Update Manager also works as a solution for upgrading ESX servers as well. While your upgrade activity might be a one-time event, getting it done in a reasonable amount of time requires automation. You get that automation through Update Manager, or the VMware Host Update Utility. You’ll see both in this nugget.
1020 00:11:05
16 Virtual Machine Backup & Restore
Converting physical machines to virtual improves their backups while it at the same time complicates their backups. When you work with virtual machines, the “perspectives” from where your backups are sourced grow in number. You need to know the best practices for backups, as well as the tools with which to accomplish those backups. In this nugget, you’ll see the VMware Backup Appliance as well as discuss other solutions with greater capabilities.
1661 00:21:56
17 Troubleshooting the vSphere Environment
Every vSphere environment has its problems, although those problems often have to do with configuration mistakes. There are a set of known problems as well as common solutions that happen within every vSphere environment. Learn about just those solutions in this nugget, where you’ll explore how to track down and fix problems both big and small in your virtual infrastructure.
1325 00:21:26
18 vCenter Server Performance Management & Alarms
It has been said that performance management is one of the most important parts of virtual infrastructure management. When you consolidate many physical hosts to few virtual hosts, you get greater optimization of resource use; but you also get a greater chance for resource overuse as well. You need to pay attention to your performance through real-time graphs and alerts if you’re to be successful. Learn exactly how in this nugget.
963 00:14:41
19 Configuring Security & Access Control in vCenter Server
You’re probably not the only member of your IT department, and as such you’re probably not the only person who will need access to your vSphere environment. Nailing down users, roles, rights, and permissions is easy in vCenter, if you know the tricks. In this nugget, you’ll learn about the two entirely-separate permissions structures that must remain in synch, as well as how to assign permitted activities to users.
872 00:15:16
20 Working with vNetwork Distributed Switches
Concluding this series is a special look at the new vNetwork Distributed Switch technology that is now available in vSphere 4.0. Using traditional network switches, you must be absolutely careful to ensure their similar configuration across the many ESX servers in your environment. Or, you can hook them all together with
Concluding this series is a special look at the new vNetwork Distributed Switch technology that is now available in vSphere 4.0. Using traditional network switches, you must be absolutely careful to ensure their similar configuration across the many ESX servers in your environment. Or, you can hook them all together with
Download Links:-
VMWARE VIRTUALIZATION VCP VSPHERE 4.part2
VMWARE VIRTUALIZATION VCP VSPHERE 4.part3
VMWARE VIRTUALIZATION VCP VSPHERE 4.part4
VMWARE VIRTUALIZATION VCP VSPHERE 4.part5
Tag :
CBT Video Training
CBT Nuggets ROUTE 642-902

CBT Nuggets ROUTE 642-902
The Implementing Cisco IP Routing (ROUTE 642-902) is a qualifying exam for the Cisco Certified Network Professional CCNP ®, Cisco Certified Internetwork Professional CCIP ®, and Cisco Certified Design Professional CCDP ® certifications. The ROUTE 642-902 exam will certify that the successful candidate has the knowledge and skills necessary to use advanced IP addressing and routing in implementing scalable and secure Cisco ISR routers connected to LANs and WANs. The exam also covers configuration of secure routing solutions to support branch offices and mobile workers.
Download Links :-
CBT Nuggets ROUTE 642-902.part2
CBT Nuggets ROUTE 642-902.part3
CBT Nuggets ROUTE 642-902.part4
CBT Nuggets ROUTE 642-902.part5
Tag :
CBT Video Training
CBT Nuggets Windows Server 2008 Server Administrator 70-646

CBT Nuggets Windows Server 2008 Server Administrator 70-646
Cool topics include: server installation and automation, read-only domain controllers and general services and file resources.
James Conrad maps this training to Microsoft Exam-Pack 70-646.
Exam-Pack 70-646: Microsoft MCTS Windows Server 2008, Server Administrator contents:
Intro
Plan Server Installations and Upgrades Part 1
Plan Server Installations and Upgrades Part 2
Plan for Automated Server Deployment
Windows Activation
IPv6
DHCP
DNS
Directory Services: Read-only Domain Controllers
Certificate Authority Part 1
Certificate Authority Part 2
RRAS and NAP
Application Servers and Services
Provision Applications
File Roles Part 1
File Roles Part 2
Backup and Recovery
Storage and Print Servers
Server Management
Group Policy Objects
Monitoring Servers
Security
High Availability
Patch Management
Download Links :-
CBT Nuggets Windows Server 2008 Server Administrator 70-646.part02
CBT Nuggets Windows Server 2008 Server Administrator 70-646.part03
CBT Nuggets Windows Server 2008 Server Administrator 70-646.part04
CBT Nuggets Windows Server 2008 Server Administrator 70-646.part05
CBT Nuggets Windows Server 2008 Server Administrator 70-646.part06
CBT Nuggets Windows Server 2008 Server Administrator 70-646.part07
CBT Nuggets Windows Server 2008 Server Administrator 70-646.part08
CBT Nuggets Windows Server 2008 Server Administrator 70-646.part09
CBT Nuggets Windows Server 2008 Server Administrator 70-646.part10
CBT Nuggets Windows Server 2008 Server Administrator 70-646.part11
CBT Nuggets Windows Server 2008 Server Administrator 70-646.part12
Tag :
CBT Video Training
Partitioning Hard Drive in Windows 7 Without Formatting

Partitioning Hard Drive in Windows 7 Without Formatting
At once a new window will open entitled “Computer Management“. In this new window click on “ Storage ” and then go to “ Disk Management “.

The completion of the second step will give you a view of all the drives present in your computer.

Among these select the one you want to partition. Then right-click on the selected drive and navigate to the option ” Shrink Volume.. “.

A new window should open in which the size of the drive before shrink will be mentioned and the available space to shrink will be mentioned , and in the next line you will be asked to enter the amount of space you want to shrink and this will be the size of the new partition.
Caution : The space you enter must be within the limit of the available space displayed above.
After entering the values click on the option “ Shrink ” and wait for the process to complete. The time taken for the operation may be long depending upon the size of the disk and the space to be shrunk. Once the operation is completed a window appears showing unallocated space and the value is exactly the one you entered earlier. Select this unallocated space and on right clicking on it click on the option “ New Simple Volume “.

A wizard will open up. Go through the wizard and fill in the values required. Usually the value needed to enter is the same one that you entered as the volume to be shrunk.
The drive newly created needs a letter to be assigned to it. Assign any letter of your choice as it does not make any difference.
A Format page will appear and in it carefully notice that the File System selected is “ NTFS ” . After this is done enter a name for your drive and then click on ” Next ” and then “ Finish “.

* Update: This article was written on the basis of a test in Windows 7 Ultimate version. But after getting the readers feedback, it seems that the procedure does not work fine in the other versions of Windows 7 like Home Premium etc. So please make sure that you are using Windows 7 ultimate before applying this method to partition the hard drive.
** Update: While the procedure works fine in Windows 7 Ultimate version, it does not work in Windows 7 home, starter or other versions properly if the number of partitions exceeds 4. That means if you try to create a new partition that is no. 5 in your hard disk, this process will not work otherwise it will work fine. So if you are in Windows 7 Home or starter edition, make sure that your total no of partition is three before you go for a new partition.
The above solution was made by one of our reader Hide.
So you have to make sure your unallocated drive is not no.5. I had to merge move files from recovery drive somewhere else and merge it with the unallocated one. After that I just followed everything here and it worked like magic. Hope this helps.
Create Multiboot USB Drive: Install Windows 7, XP From Same USB Drive

Install Windows 7, XP From Same USB Drive
Creating the multiboot USB drive is too easy and involves four simple steps. Before getting into the process, make sure that the USB drive that you have, is minimum 4 GB of volume (recommended 8 GB) and formatted with FAT32 file system. Once you are ready, download WinSetupFromUSB and extract at any location of your computer.

1. Insert the formatted USB drive in the USB post of your computer and run the WinSetupFromUSB_1-0-beta7.exe.
2. Make sure that the the utility has detected your USB drive.
3. Now enable the option Windows 2000/XP/2003 Setup selecting the check box and browse to the Windows XP installation file location. Next, enable the option Vista/7/Server 2008 Setup/PE/RecoveryISO and browse to the Windows 7 installation files’ location. In both of the cases, if you have the ISO images, extract them by WinRar or 7-Zip.
Though we have discussed the process for only Windows XP and Windows 7, you can also add Windows Vista as well as Linux.
Insert Your Image in window7 login Background

Insert Your Image in window7 login Background
Step 1: Open the Run dialog box and type regedit
HKLM\SOFTWARE\Microsoft\Windows\CurrentVersion\Authentication\LogonUI\Background.
If the key does not exist, add a new DWORD value with the name OEMBackground.
Step: 3 Double click on the entry OEMBackground, and change the value from 0 to 1

Step: 5 create a new folder named info, and open it.
Step: 6 Create a new folder within info named backgrounds.
Rename your desired wallpaper as backgroundDefault.jpg and place it inside the folder backgrounds (images must be less than 245KB in size).
Other Way
First download the free application here, run it.

Change Logon Screen” lets you browse to a new image, “Test” will bring up your logon screen
ENJOYYYY
How To Reinstall Windows 7 Without Changing Your Personal Settings, Installed Programs & Drivers

Windows 7
Windows has a tendency to accumulate errors and problems over time. While some of this virtual wear and tear can be delayed by rigorous system maintenance and keeping malware at the gate, the time will come when you will be forced to reinstall your system.
A Windows re-installation is a tedious process. It takes time and once the new installation is in place, you essentially start from scratch. Your user files are wiped and have to be restored, programs need to be re-installed, and personal preferences have to be set up all over again. Since the ‘perfect setup’ is a work in progress, driven by all sorts of updates and new gadgets, creating an image of your operating system is a waste of time. And as time goes by, the nightmare will start all over again. Except if there was a way to re-install your operating system and fix system-based issues without losing all your stuff….Starting with Windows XP, Microsoft has been offering what is called a “non-destructive reinstall ability” for Windows. It is a way of re-installing the operating system without changing user data, settings, and preferences, including installed programs and drivers. After re-installing Windows with this method, you will log onto your account as if nothing had happened, except that all system files were ‘updated’, which almost equals a fresh installation.
Preface: What You Need
- Windows 7 installation DVD.
- original 25-character product key.
- minimum 12,869MB free space on system drive (C:)
- bootable Windows 7 installation.
For the non-destructive installation to work, you must be able to boot into Windows 7 full, not Safe Mode. I also highly recommend to prepare a backup of your data before you attempt to re-install.
Step 1: Uninstall Service Pack 1
Running SP1 can cause issues when performing a non-destructive re-installation with an installation DVD that does not contain SP1. It is thus recommended to uninstall SP1 before you proceed.- Go to > Start > Control Panel > Programs and Features or > Programs > Uninstall a Program.
- In the left-hand side click > View installed updates
- Select > Service Pack for Microsoft Windows (KB976932) and click > Uninstall.

Step 2: Run Setup In Compatibility Mode :
his step is optional. You can skip it and return to it if needed. The pre-installation compatibility report might not let you proceed due to the following issue:
Your current version of Windows is more recent than the version you are trying to upgrade to. Windows cannot complete upgrade.To avoid this error :
- Go to > Computer, right-click on the installation DVD and select > Open.
- Right-click on > setup.exe and choose > Properties.
- Switch to the > Compatibility tab and check > Run this program in compatibility mode for:Windows Vista (Service Pack 2) from the list. and pick >
- Click > OK and double-click > setup.exe to launch the installation.

Step 3: Run Setup
When you run the setup.exe from the DVD, Windows will ask whether you want to allow the program to make changes to your computer. Click > Yes to proceed.
In the next windows click > Install now to start the installation.

Windows setup will now proceed with copying temporary files and running a compatibility check. When presented with the first selection screen (see screenshot below), select the first option to > go online and get the latest updates, then > accept the license terms and press > Next to continue.

Key Step: Select Upgrade Installation Type
Select > Upgrade when asked which type of installation you want.
You are not actually upgrading, but rather installing the same operating system over your existing installation. However, since you selected upgrade, your files, settings, and programs will be left alone. The installation takes about an hour and will re-boot your system several times during the process.


Aftermath: Run Updates, Upgrade Internet Explorer & Install SP1
Several things were changed when your system was upgraded. You were reverted to the Service Pack version on your installation DVD (likely pre-SP1) and Internet Explorer was downgraded to version 8 (in case you were running IE9).Go to > Start > Control Panel > Windows Update or > System and Security > Windows UpdateInstall updates. You will have to reboot and go through this process several times to bring your system up to date. If you don’t see any updates, click on > Check for updates on the left-hand side. and click on >

The entire update procedure took me around 90 minutes, which was a lot faster and a lot less hassle than a complete re-installation. What are your experiences with the process?
CAINE (Computer Aided INvestigative Environment) – Digital Forensics LiveCD

CAINE (Computer Aided INvestigative Environment)
The main design objectives that CAINE aims to guarantee are the following:
- an interoperable environment that supports the digital investigator during the four phases of the digital investigation
- a user friendly graphical interface
- a semi-automated compilation of the final report
- New NAUTILUS SCripts
- ataraw
- bloom
- fiwalk
- xnview
- NOMODESET in starting menu
- xmount
- sshfs
- Reporting by Caine Interface fixed
- xmount-gui
- nbtempo
- fileinfo
- TSK_Gui
- Raid utils e bridge utils
- SMBFS
- BBT.py
- Widows Side:
- Wintaylor updated & upgraded
“mounter” is a GUI mounting tool that sits in the system tray. Left clicking the system tray drive icon activates a window where the user can select devices to mount or un-mount. With rbfstab activated, all devices, except those with volume label “RBFSTAB”, are mounted read-only. Mounting of block devices in Nautilus (file browser) is not possible for a normal user with rbfstab activated making mounter a consistent interface for users.
You can download CAINE 2.5/Supernova here:

Tag :
CHFI
Re - Install Internet Explore

Re - Install Internet Explore
Re - Install Internet Explorer:
1. Insert the Windows XP cd.(If you are using SP2 then use Windows XP Sp2 Cd)
2. Goto Start --> Run
3. Type the following cmd:
rundll32.exe setupapi,InstallHinfSection DefaultInstall 132 c:\windows\inf\ie.inf
4. Then it will fix the problem.
Setup and Use PROXY with Firefox

Setup and Use PROXY with Firefox
This is a simple guide on how to use proxy with Mozilla Firefox Browser:
If you use proxies, you can:
a) download as many time you like using Rapidshare.de
b) Use Megaupload if your country slot is limited.
c) Enhance your privacy (no one can whois you)
d) Avoid hacker
e) Download faster (some proxies containe internet cache)
To get free proxies, go here
How to setup proxy:
Older Version: Go to tools>option>general>connection
Latest Version: Go to tools>options>advanced>network>settings

Enter setting like this screenshot: make sure that you change the proxy address
Enable Telnet in windows 7
It’s very rare that I use Telnet these days, so it took a long time for me to notice that by default it was not packaged with Windows 7. I did some research and found out that this was also true for Windows Vista. More than likely this was an attempt to make Windows more secure by default, as Telnet is very insecure and whenever you have the choice you should always use SSH. However, with that being said, you can quickly re-enable Telnet by following these steps:
- Start
- Control Panel
- Programs And Features
- Turn Windows features on or off
- Check Telnet Client
- Hit OK
XP Quick Fix Plus Download - Error Repair Tool

XP Quick Fix Plus Download - Error Repair Tool
Hello guys , as we all know nowadays virus attacks are very common and we have to have lot of problems because of viruses like task manager does not opens,folder options missing, registry has been disabled by administrator,cannot find dll and so on. These are very common problems and can happen with any of us so we must know to fix these problems without formatting your windows XP. Most of the virus infects your basic programs i.e task manager,registry,group policy editor,boot up,folder properties etc. Today i will tell how to Fix windows Xp after virus attack in this article
There are several free tool in the market that can help you to fix your windows xp after virus attacks but i always come with complete package. Don't worry friends its also a free tool but using this you can recover almost every windows services and functionality within few seconds and that's also without formatting. Why i am telling all this is because we must know how to recover along with how to hack and hacking...
The features of the tool that i have discussed above is called QUICK FIX.
Quick fix is really an outstanding tool. Its an complete solution of a to z windows XP problems. You can recover back from all types of virus attacks using this tool.
The command line parameters:
Go to DOS prompt (cmd.exe),and change directory to the program folder where XP Quick Fix Plus installed and run QFC.EXE with the parameters:
QFC /f - quick enable the Folder Options
QFC /e - quick restore the Run Dialog
QFC /t - quick enable the Task Manager
QFC /p - quick restore My Computer Properties
QFC /x - Quick fix Windows can't run exe files
QFC /r - quick enable the Rgistry Editor
QFC /f - quick enable the Folder Options
QFC /e - quick restore the Run Dialog
QFC /t - quick enable the Task Manager
QFC /p - quick restore My Computer Properties
QFC /x - Quick fix Windows can't run exe files
QFC /r - quick enable the Rgistry Editor
Download Link :-

How To View Passwords Hidden Behind Asterisk Characters
How To View Passwords Hidden Behind Asterisk Characters

Say you’ve taken on a new job and you find that the fellow (or fellows) doing the job before have never documented their passwords for the many applications you need to do your job. Purely hypothetical, I’m sure it NEVER happens.
Let’s also say that you have a major update to do and you can’t get a hold of the web host to change the password, because it’s 4:59pm on a Friday. What on earth can you do?
Well, let me point out a few tools that will allow you view passwords behind asterisk characters and let your employers know they have the übergeek for the job!
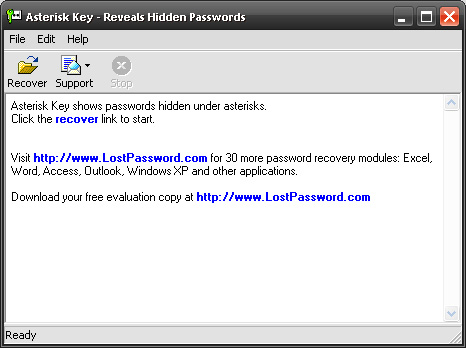
View One Hidden Asterisk Password at a Time
Most of the programs I came across worked the same way ““ open the locked program, open the password revealer, click on a button called ‘password reveal’ or some similar thing, then get the password.
Asterisk Key from Passware is one such solution. It will run on Windows 2000/NT/XP/2003/Vista and requires 64MB of RAM and at least a Pentium 300 processor. Seriously, if you don’t have at least that, send me a self-addressed stamped envelope and I’ll print you a copy of this article. You’ll get it faster.
What you’ll notice at first is that this is a piece of loss-leader software from a company that would like to sell you their other wares. Nothing wrong with that.

That’s great, but what if you have several applications from which you need to recover and view password fields? That’s where I find this next piece of freeware to be most useful.
Reveal Multiple Hidden Passwords
Asterisk Logger from NirSoft makes the process of recovering multiple passwords that are hiddent behind asterisk characters very easy. It works on Windows 9x, ME, 2000 and XP and with a little tweaking it will work on NT. I’m not sure about Vista, since I never made that leap.
The feature of Asterisk Logger that puts it above other asterisk revealer freeware is the fact that it logs the passwords AND shows the password in plain text right in the program you are using. Simply open up Asterisk Logger and start using those programs that you forgot the password for. Below you can see how Asterisk Logger reveals the password right in the program you are using as well as in Asterisk Logger.


After a session on the computer with Asterisk Logger open, you can save the log to a text file to refer to it later. But remember to not tell anyone where the list is ““ that’s called job security!
Asterisk Logger does not work well with instant messenging applications though. But NirSoft has a pill for that too.
Reveal Instant Messenger Passwords
Yes, I am a NirSoft fanboy. If it works, it works. I searched for and tested others specifically designed for instant messaging (IM) software. They either weren’t really freeware or seemed sketchy.
MessenPass works.
“How well, Guy?”, you inquire. Well, I hate instant messaging so I haven’t used mine in about a year or so. I installed and fired up MessenPass and it not only found the password I was looking for, but an account I forgot I even made and its password as well.

Well, now you know my MSN username, so go ahead and add me. I probably won’t respond though. I am to IM what the old guy with the shotgun full of rock salt, sitting in a rocking chair, is to meddling kids. Get off my IM! Dagnabbit!!!
Got any other leads on cool freeware apps that reveal what’s behind those asterisks? Love to see them. Any stories about getting snookered by hidden passwords? I’d love to read those too.