- Back to Home »
- Windows »
- Configure Specific E-Mail Addresses for Specific Exchange 2007 Recipients
Saturday, December 3, 2011
In Exchange 2000/2003, in order to generate a new or different E-Mail address for specific recipients, you had to edit or create Recipient Policies. In Exchange 2007, E-mail Address Policies are the components that generate the primary and secondary e-mail addresses for your recipients (which include users, contacts, and groups) so they can receive and send e-mail. By default, Exchange 2007 contains an e-mail address policy that specifies the recipient's alias (usually, but not necessarily – the same as the user's logon name) as the local part of the e-mail address, and uses the default accepted domain. The local part of an e-mail address is the name that appears before the "@" sign. By using custom e-mail address policies, you can define how the recipients' e-mail addresses will display.
If you delete an accepted domain that is used in an e-mail address policy, the policy is no longer valid, and recipients with e-mail addresses in that SMTP domain will be unable to send or receive e-mail.
As always, you can do this is one of two ways:
Using Exchange Management Console (EMC):
1.Open the Exchange Management Console.
2.In the console tree, expand Organization Configuration, and then click Hub Transport.
3.In the action pane, click New E-mail Address Policy.
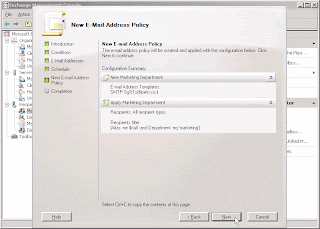
4.The New E-Mail Address Policy wizard appears
5.On the Introduction page, enter the following information:
Name of the new e-mail address policy. The name can contain as many as 64 characters but cannot include wildcard characters.
Click the "All recipient types" checkbox to apply the e-mail address policy to all recipient types. In Exchange 2007, recipients are comprised of mailbox users, mail-enabled users, mail contacts, mail-enabled distribution and security groups, and mail-enabled public folders.
Instead of applying the policy to all the recipient types, you can click the "The following specific types" checkbox to apply the e-mail address policy to specific recipient types. You can select one or more of the following recipient types:
6.Click Next.
7.On the Conditions page, compete the following fields:
- Recipient is in a State or Province
- Recipient is in a Department
- Recipient is in a Company
- Any one of the 15 Custom Attributes
8.If you selected any of the conditions in the previous step, for each condition, click the underlined term to create your condition. After you edit the condition, the underlined term will change to the value that you specified. If you click an underlined value for the State or Province, Department, or Company conditions, a dialog box appears in which you can specify the values for the condition.
9.If you wish to preview the recipients that will be filtered by that condition, press the Preview button.
10.When satisfied, press Next.
11.On the E-Mail Addresses tab, click Add to add a new e-mail address to your e-mail address policy. Use the drop-down box to select an SMTP e-mail address (default) or a custom e-mail address. In most cases, the SMTP E-Mail Address is what you are looking for. You can use the SMTP E-Mail Address dialog box to configure the format of your organization's Simple Mail Transfer Protocol (SMTP) e-mail addresses.
12.Select from the following options:
- Use alias
- First name.last name (john.smith)
- First name initial and last name (jsmith)
- First name and last name initial (johns)
- Last name first name (smith.john)
- Last name initial and first name (sjohn)
- Last name and first name initial (smithj)
- E-mail address domain - Use this box to select the e-mail address domain to which this e-mail address policy applies. You can also create additional e-mail address policies if your organization receives mail for multiple domains, or if your default domain is used strictly for internal purposes and you use a different external mail domain
13.On the Schedule page, in the "Apply the e-mail address policy" section, select one of the following schedule settings to specify when the e-mail address policy should be applied:
- Immediately - Select this option to apply the e-mail address policy as soon as the e-mail address policy is created.
- At the following time - Select this option and use the corresponding drop-down lists to specify a time to apply the new e-mail address policy.
14.Click Next.
15.On the New E-Mail Address Policy page, review your configuration settings. Click New to create the e-mail address policy, or click Back to make configuration changes.
16.On the Completion page, confirm that the new e-mail address policy was created successfully. If the task fails, review the summary for an explanation. You can click Back to make any configuration changes. Click Finish to complete the New E-Mail Address Policy wizard.
Using Exchange Management Shell (PowerShell prompt):
Open the Exchange Management Shell prompt, then type:
new-EmailAddressPolicy -Name 'Sales' -IncludedRecipients 'AllRecipients' -ConditionalDepartment 'Sales' -Priority 'Lowest' -EnabledEmailAddressTemplates 'SMTP:%g%1s@petri.co.il'
Note: The –IncludedRecipients, -ConditionalDepartment, -Priority
and –EnabledEmailAddressTemplates parameters are all part of this
example and can be changed to suit your needs.
Checking that the E-Mail Policies were successfully applied
In order to check to see if the e-mail policies were in fact correctly
applied, the easiest way is to sample one or more recipients that should
 have been modified by the policy.
1.In the Exchange Management Console go to Recipient Configuration >
Mailbox and then double-click on one of the recipients that should have
been modified. 2.Go to the E-Mail tab and look at the results.Note that the previous E-Mail address is still there, and that it was not removed by the new e-mail address policy.


